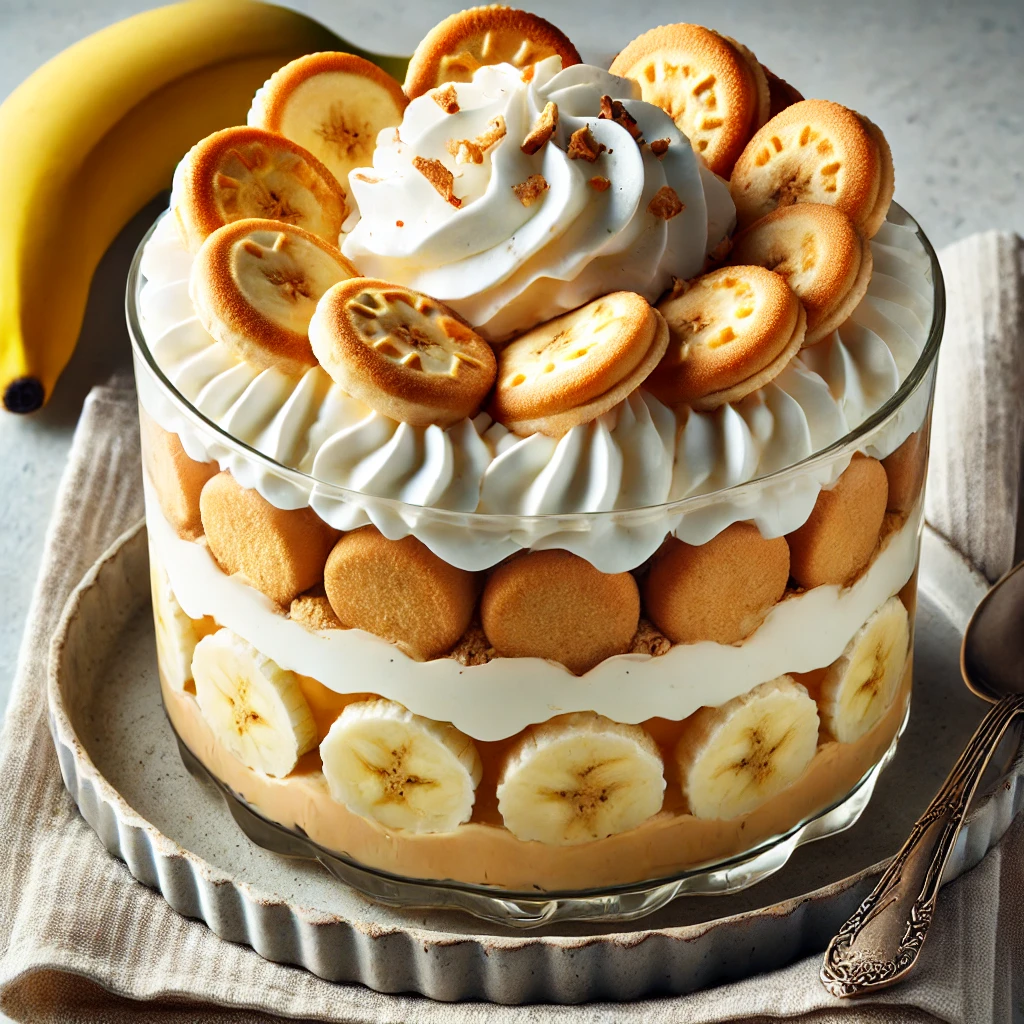
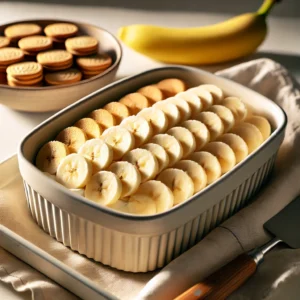
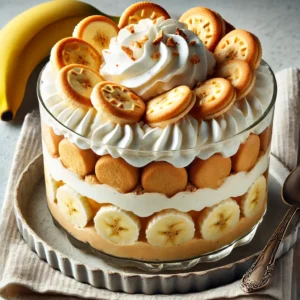
If you’re looking for a delicious and easy dessert that’s sure to impress, banana pudding is the answer. This classic American dessert combines layers of creamy vanilla pudding, fresh banana slices, and crispy vanilla wafers, all topped with a light and fluffy whipped cream. It’s a comfort food favorite perfect for any occasion—hosting a family gathering, celebrating a special event, or simply craving a sweet treat.
In this guide, we’ll explore the history of banana pudding, provide step-by-step instructions for making a perfect, easy banana pudding, and share tips, variations, and serving ideas to make this dessert your own. So, let’s dive in and discover why banana pudding is a timeless dessert loved by many.
The History of Banana Pudding
Banana pudding has a deep-rooted history in the United States, dating back to the late 19th century. Bananas were introduced to the American market in the 1870s, and soon after, they became a popular ingredient in various desserts. The earliest versions of banana pudding were made with layers of custard, sponge cake, and bananas. However, it wasn’t until the 1920s and 1930s that vanilla wafers became a common addition, solidifying the dish we know today.
The dish became widely popular in the South, where it was often served at church gatherings, family dinners, and potlucks. Over time, banana pudding became a classic dessert enjoyed nationwide. While the original versions were more labor-intensive, modern recipes often use instant pudding and whipped cream to create a quick and easy dessert without sacrificing flavor.
Ingredients You’ll Need for Easy Banana Pudding
To make a simple yet delicious banana pudding, gather the following ingredients:
Essential Ingredients:
- 1 can of sweetened condensed milk (395g)
- 1 1/2 cups cold water
- 1 package instant vanilla pudding mix (100g)
- 3 cups whipped cream (you can use store-bought or homemade whipped cream)
- 1 package of vanilla wafers
- 4 bananas, sliced
Optional Ingredients for Extra Flavor:
- 1 teaspoon vanilla extract (for added flavor)
- 1/4 cup crushed nuts (like pecans or walnuts) for a crunchy topping
- 1/4 teaspoon ground cinnamon (to sprinkle over the bananas)
- 1 tablespoon banana liqueur (for an adult twist)
- Chocolate chips or shavings for a decadent touch
Ingredient Substitutions:
- You can substitute the sweetened condensed milk with a low-fat version if you want a lighter version.
- Use coconut whipped cream and a dairy-free pudding mix for a dairy-free option.
- If you don’t have vanilla wafers, you can use graham crackers, shortbread cookies, or biscuits instead.
Equipment You’ll Need
To make this banana pudding, you’ll need a few basic kitchen tools:
- Mixing bowl: For combining the pudding ingredients.
- Whisk: Mix the pudding and make it smooth.
- Spatula: For folding in the whipped cream.
- Serving dish: A trifle dish, glass bowl, or individual dessert cups work well.
- Refrigerator: Essential for chilling the pudding to allow the flavors to meld together.
Step-by-Step Guide to Making Easy Banana Pudding
Follow these simple steps to create a creamy and delicious banana pudding that everyone will love:
1. Prepare the Pudding Base
The pudding is the creamy foundation of this dessert, and it’s incredibly easy to prepare.
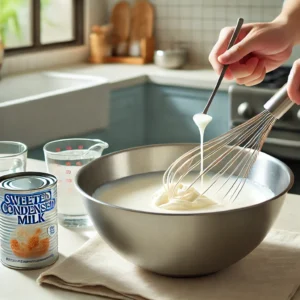
Combine Sweetened Condensed Milk and Water:
- Combine 1 can of sweetened condensed milk in a large mixing bowl with 1 1/2 cups of cold water.
- Use a whisk to mix until the sweetened condensed milk is fully dissolved in the water. This will create a smooth and creamy base for the pudding.
2. Add the Pudding Mix
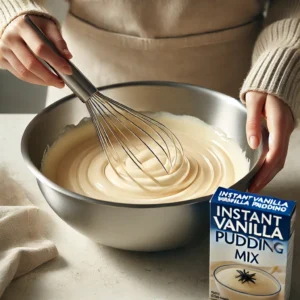
Mix in the Instant Vanilla Pudding:
- Add 1 package of instant vanilla pudding mix (100g) to the sweetened condensed milk mixture.
- Whisk until smooth and fully combined. The mixture should start to thicken as the pudding mix activates.
- Once mixed, cover the bowl and refrigerate for about 5 minutes to allow the pudding to set and thicken.
3. Fold in the Whipped Cream
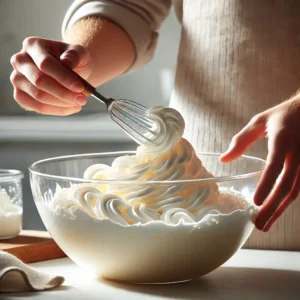
To create a light and airy texture:
- Take the chilled pudding mixture out of the refrigerator.
- Gently fold in 3 cups of whipped cream using a spatula. Fold until the whipped cream is evenly incorporated, creating a smooth, fluffy pudding mixture.
Tip: Fold gently to avoid deflating the whipped cream, as this will keep the pudding light and creamy.
4. Layer the Banana Pudding
Now it’s time to assemble the banana pudding with all the delicious layers:
Start with Vanilla Wafers:
- In a serving dish or trifle bowl, layer the bottom with a single layer of vanilla wafers. The wafers will form the base and add a crunchy texture.
Add Sliced Bananas:
- Arrange a layer of sliced bananas over the vanilla wafers. The bananas should cover the entire surface to ensure each bite has a burst of fresh banana flavor.
Add the Pudding Mixture:
- Spoon a layer of the pudding mixture over the bananas, spreading it evenly to cover the entire layer.
5. Repeat the Layers
Continue layering until all ingredients are used:
- Repeat the layers of vanilla wafers, sliced bananas, and pudding until you reach the top of your serving dish.
- Top with a final layer of the pudding mixture to complete the dessert.
6. Chill and Serve
For the best flavor and texture:
- Cover the dish with plastic wrap and refrigerate for at least 2-3 hours, or overnight if possible. This allows the wafers to soften slightly and the flavors to meld together.
- Before serving, you can garnish the top with additional whipped cream, crushed nuts, or a sprinkle of cinnamon for a beautiful presentation.
Tips for the Perfect Banana Pudding
Creating the best banana pudding involves a few simple tricks that can elevate your dessert:
1. Use Fresh, Ripe Bananas
Choose bananas that are ripe but not overripe. They should be yellow with a few brown spots, indicating they are sweet and flavorful. Overripe bananas may become too mushy, while underripe bananas can be bland.
2. Fold the Whipped Cream Gently
To maintain a light and airy texture, gently fold the whipped cream into the pudding mixture. This will prevent the whipped cream from deflating and keep the pudding fluffy.
3. Allow Time for Chilling
Banana pudding tastes best when it has time to chill in the refrigerator. This allows the flavors to meld together, and the wafers soften to the perfect texture. Plan to refrigerate the pudding for at least 2-3 hours before serving.
4. Experiment with Flavors
Add a teaspoon of vanilla extract, a pinch of cinnamon, or a splash of banana liqueur to the pudding mixture for a unique twist. These small additions can enhance the overall flavor.
5. Prevent Bananas from Browning
To keep the banana slices from browning, you can toss them in a little lemon juice before layering them in the pudding. The acidity will help maintain their bright color.
Variations on Banana Pudding
Banana pudding is a versatile dessert you can customize to suit your taste preferences. Here are some ideas to inspire you:
1. Classic Southern Banana Pudding
- Use a homemade custard instead of instant pudding for a traditional Southern-style banana pudding. This involves cooking a custard on the stovetop with eggs, sugar, and milk until thickened.
2. Peanut Butter Banana Pudding
- Add 1/4 cup of creamy peanut butter to the pudding mixture for a rich, nutty twist. Peanut butter pairs wonderfully with bananas, adding a decadent touch to the dessert.
3. Chocolate Banana Pudding
- Use a chocolate pudding mix instead of vanilla for a chocolate banana pudding. You can add a layer of chocolate shavings or a drizzle of chocolate syrup between the layers for extra chocolatey goodness.
4. Tropical Banana Pudding
- Mix in some crushed pineapple or sliced mango for a tropical variation. You can also use coconut whipped cream for a hint of tropical flavor.
5. No-Bake Banana Pudding Cheesecake
- Create a layered banana pudding cheesecake by adding a layer of cream cheese mixed with powdered sugar and vanilla on top of the pudding mixture. This adds a tangy, creamy contrast to the sweet banana flavor.
Nutrition Information (Per Serving)
Here’s a typical nutritional breakdown for a serving of this easy banana pudding:
- Calories: 420 kcal
- Carbohydrates: 64g
- Protein: 6g
- Fat: 14g
- Saturated Fat: 8g
- Polyunsaturated Fat: 0.5g
- Monounsaturated Fat: 3g
- Cholesterol: 30mg
- Sodium: 220mg
- Potassium: 310mg
- Fiber: 2g
- Sugar: 42g
- Vitamin A: 480 IU
- Vitamin C: 8 mg
- Calcium: 175 mg
- Iron: 1.2 mg
Frequently Asked Questions (FAQs)
1. Is it possible to prepare banana pudding in advance?
Yes! Banana pudding is a great make-ahead dessert. You can make it a day ahead and let it chill overnight. This allows the flavors to meld together, and the wafers soften to a delicious texture.
2. What are the best ways to prevent bananas from browning?
Toss the banana slices in a little lemon juice before layering them in the pudding to prevent browning. The acidity from the lemon juice will help preserve their color.
3. Can I substitute store-bought whipped cream with homemade?
Absolutely! Homemade whipped cream adds a fresh and airy texture to the dessert. Simply beat heavy cream with a little powdered sugar and vanilla extract until stiff peaks form.
4. How long does banana pudding stay fresh in the refrigerator?
Banana pudding can be kept in the refrigerator for up to 3 days. However, the texture may change as the wafers continue to soften. It’s best to enjoy it within the first 1-2 days for the best taste and texture.
5. Can I freeze banana pudding?
Freezing banana pudding is not recommended, as the texture of the bananas and pudding can become mushy after thawing. It’s best enjoyed fresh or refrigerated.
Conclusion
Banana pudding is a creamy, nostalgic dessert that’s incredibly easy to make and always a crowd-pleaser. With its rich vanilla pudding, fresh banana slices, and crispy vanilla wafers, it’s no wonder this dessert has remained a favorite for generations. Whether you stick to the classic recipe or get creative with flavors and variations, banana pudding is a versatile treat perfect for any occasion. Enjoy making it at home and share the joy of this delicious dessert with family and friends!
For more Banana Pudding, check out the link
Easy Banana Pudding Recipe
Equipment
- 1 Mixing bowl
- 1 whisk
- 1 spatula
- 1 serving dish
- 1 refrigerator
Ingredients
- 1 can sweetened condensed milk 395g
- 1/2 cups cold water
- 1 package instant vanilla pudding mix 100g
- 3 cups whipped cream
- 1 package vanilla wafers
- 4 bananas sliced bananas
Instructions
- In a large bowl, combine sweetened condensed milk with cold water and mix well

- Add the instant vanilla pudding mix and whisk until smooth

- Refrigerate the mixture for 5 minutes to thicken.

- Gently fold the whipped cream into the pudding mixture until well combined.

- In a serving dish, arrange a layer of vanilla wafers at the bottom, then add a layer of sliced bananas.

- Spoon a layer of the pudding mixture over the bananas.
- Continue layering (wafers, bananas, pudding) until all ingredients are used.
- Refrigerate for at least 2-3 hours before serving.
Notes
For the creamiest texture, make sure to fold the whipped cream gently into the pudding mixture to avoid deflating the cream.

